
Splatoon 3 Callie Wig Guide: EVA FOAM SCULPTURAL Methods
So you have your EVA wig base (and maybe you inked your base too)…..
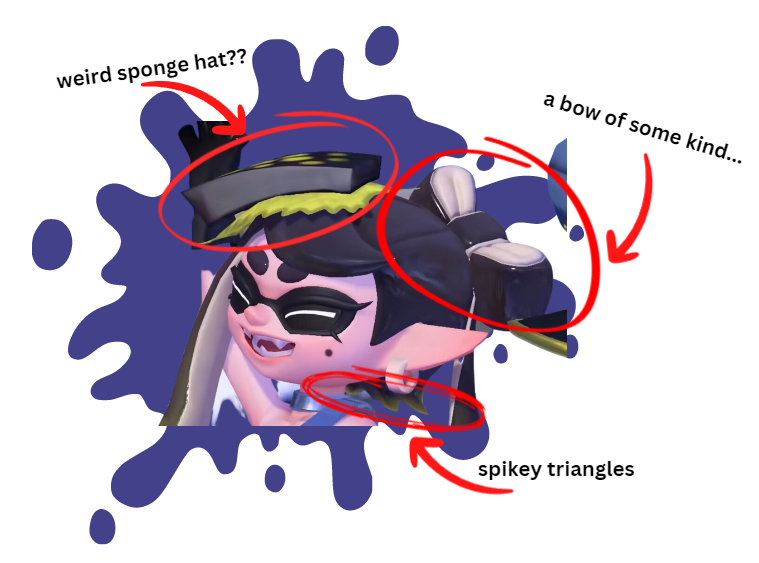
But what about the bow? Or the little triangular spikes on the back of the wig? Or the sponge-like hat?
3 Dimensional Shapes?! How Do?!
This part of the tutorial will walk you through how to make the weird shapes that may be on your wig using sculptural EVA foam methods.
Imagine a Cube……………….
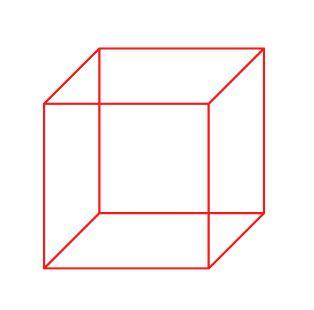
Put the piece you are trying to make in the cube…
In this case we will start with the sponge (disregard the leaf… I know you want to do the leaf too … take it one piece at a time!)
A cube has 6 sides… Top and bottom. 4 sides.
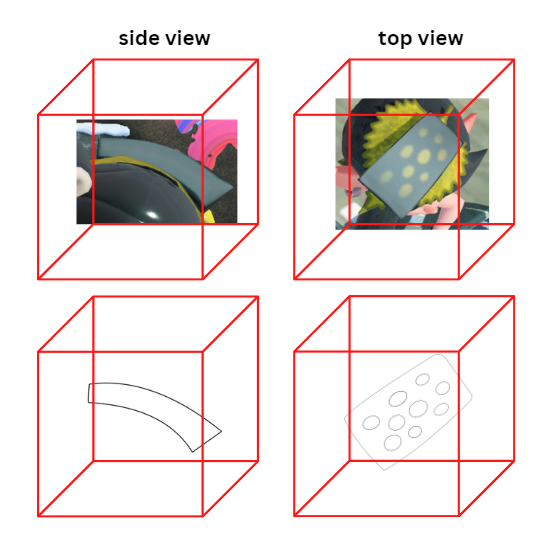
Like the cube your sponge has a top/bottom and side views.
Rotate your sponge in the cube.
Notice the silhouette!
You will be applying this in real life with EVA foam!
NOTE: Remember when patterning to make each piece is the correct side. If that top edge is one length… it needs to able to match up with the sides.


Start by making your foam cube by layering your thickest EVA foam.
(basically you will first pick a side and cut out a bunch of the same shape to get started on the silhouette of one of the sides).
MAKE YOUR CUBE SLIGHTLY BIGGER THAN THE SILHOUETTE SO YOU CAN MAKE FINE ADJUSTMENTS!
Trace one of the side patterns onto the foam cube you made
start cutting until you get the silhouette of that one side you are working on.
When satisfied with one side. Flip it to the next view!
Trace your next view onto the correct side of the foam. (if you just did the side view… then do the top view or other way around if you started with the top view).
Make sure to LINE UP where the sides are supposed to be!
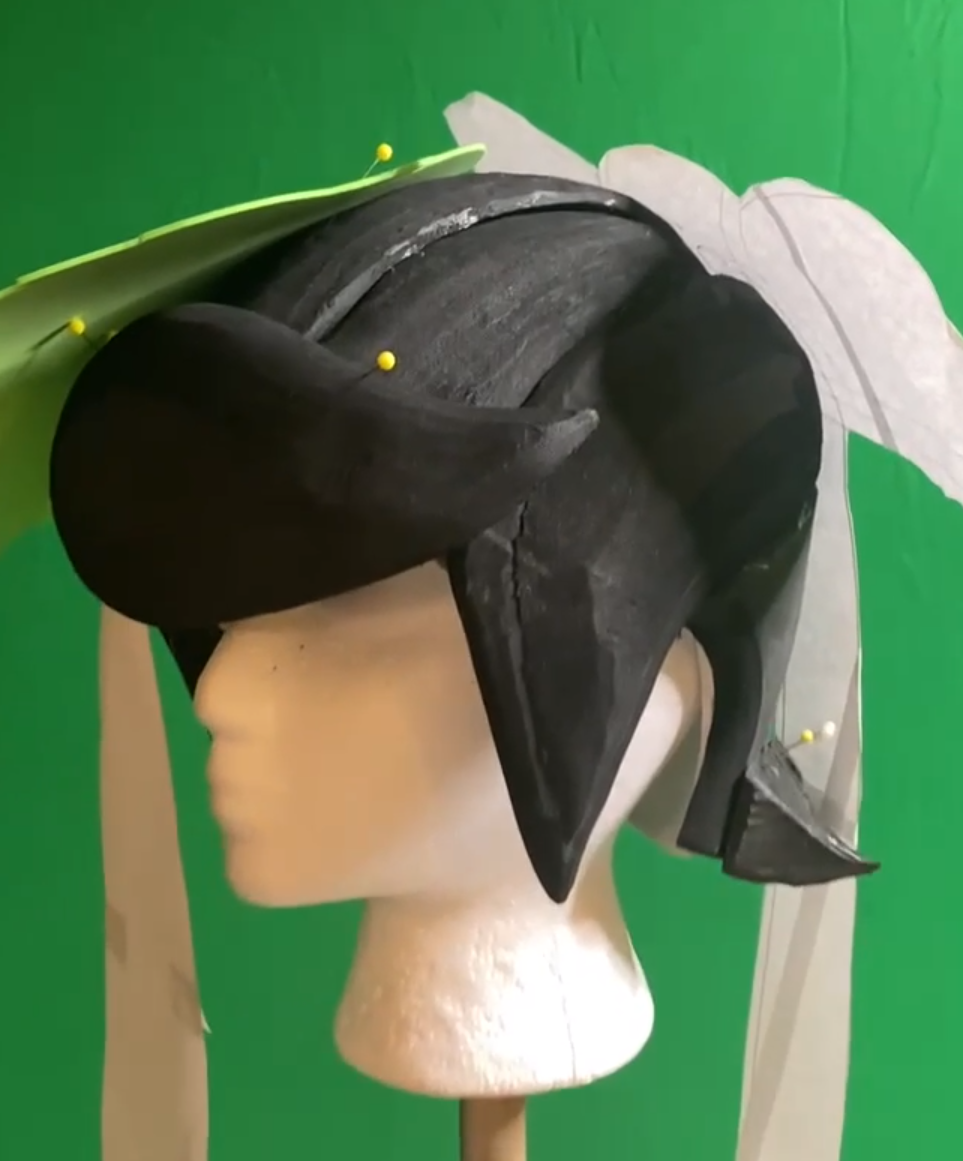
Cut away until you have the correct shape… your little foam block should actually start looking like a sponge!
Now that you have the basic shape - you can start fine tuning it!
If you tilt your sponge… what do the edges look like. Are there bevels? Is something supposed to be rounded at all?
For the sponge in particular - the edges have a soft roundness.
Use your dremel to carefully sand the edges to have a softer look.
Annnddd you have your sponge!
A reward for your victory…. I did the pattern for the leaf for you!
*make sure to scale it to your sponge!!!


Let’s now move onto the little spikey Triangles!
You are pretty much going to apply the same cube method we just did for the sponge.
We are going to make a bunch of these little triangles so you will get a ton of practice!!
(when I say a bunch… I mean 4… there are 4 of them but you can keep making them until you get ones you are satisfied with! Practice!!)
If you look close at the picture on the left… I glued 5 layers of my thickest foam to make my foam cube base.
Pick a side and trace your pattern.
Cut.
Depending on which side you started with… it should either be a triangular top view or on the side a triangular shape that flares a bit upward.
(see also OTHER picture to the left for other view).
Do the next side. Remember we are trying to get the silhouettes.
its going to look kinda choppy… now worries….
Do you like the basic triangular shape?
Let’s smooth the rough edges with your dremel!
The wig shouldn’t have any rough spots… try to get it as smooth as you can.
Then pin the triangles onto the wig before gluing them in place with contact cement (or hot glue… whatever works for you!)
IF THERE ARE HOLES/GAPS DO NOT WORRY ABOUT IT! Next section will go into how to clean those up!

What about the Bow?!
Again… same CUBE technique!
“But wait why make an EVA foam bow instead of sew a real one????”
I am going to jump a little bit ahead to make a point here of why exactly we want to do the bow out of EVA foam instead of a sewing type method….
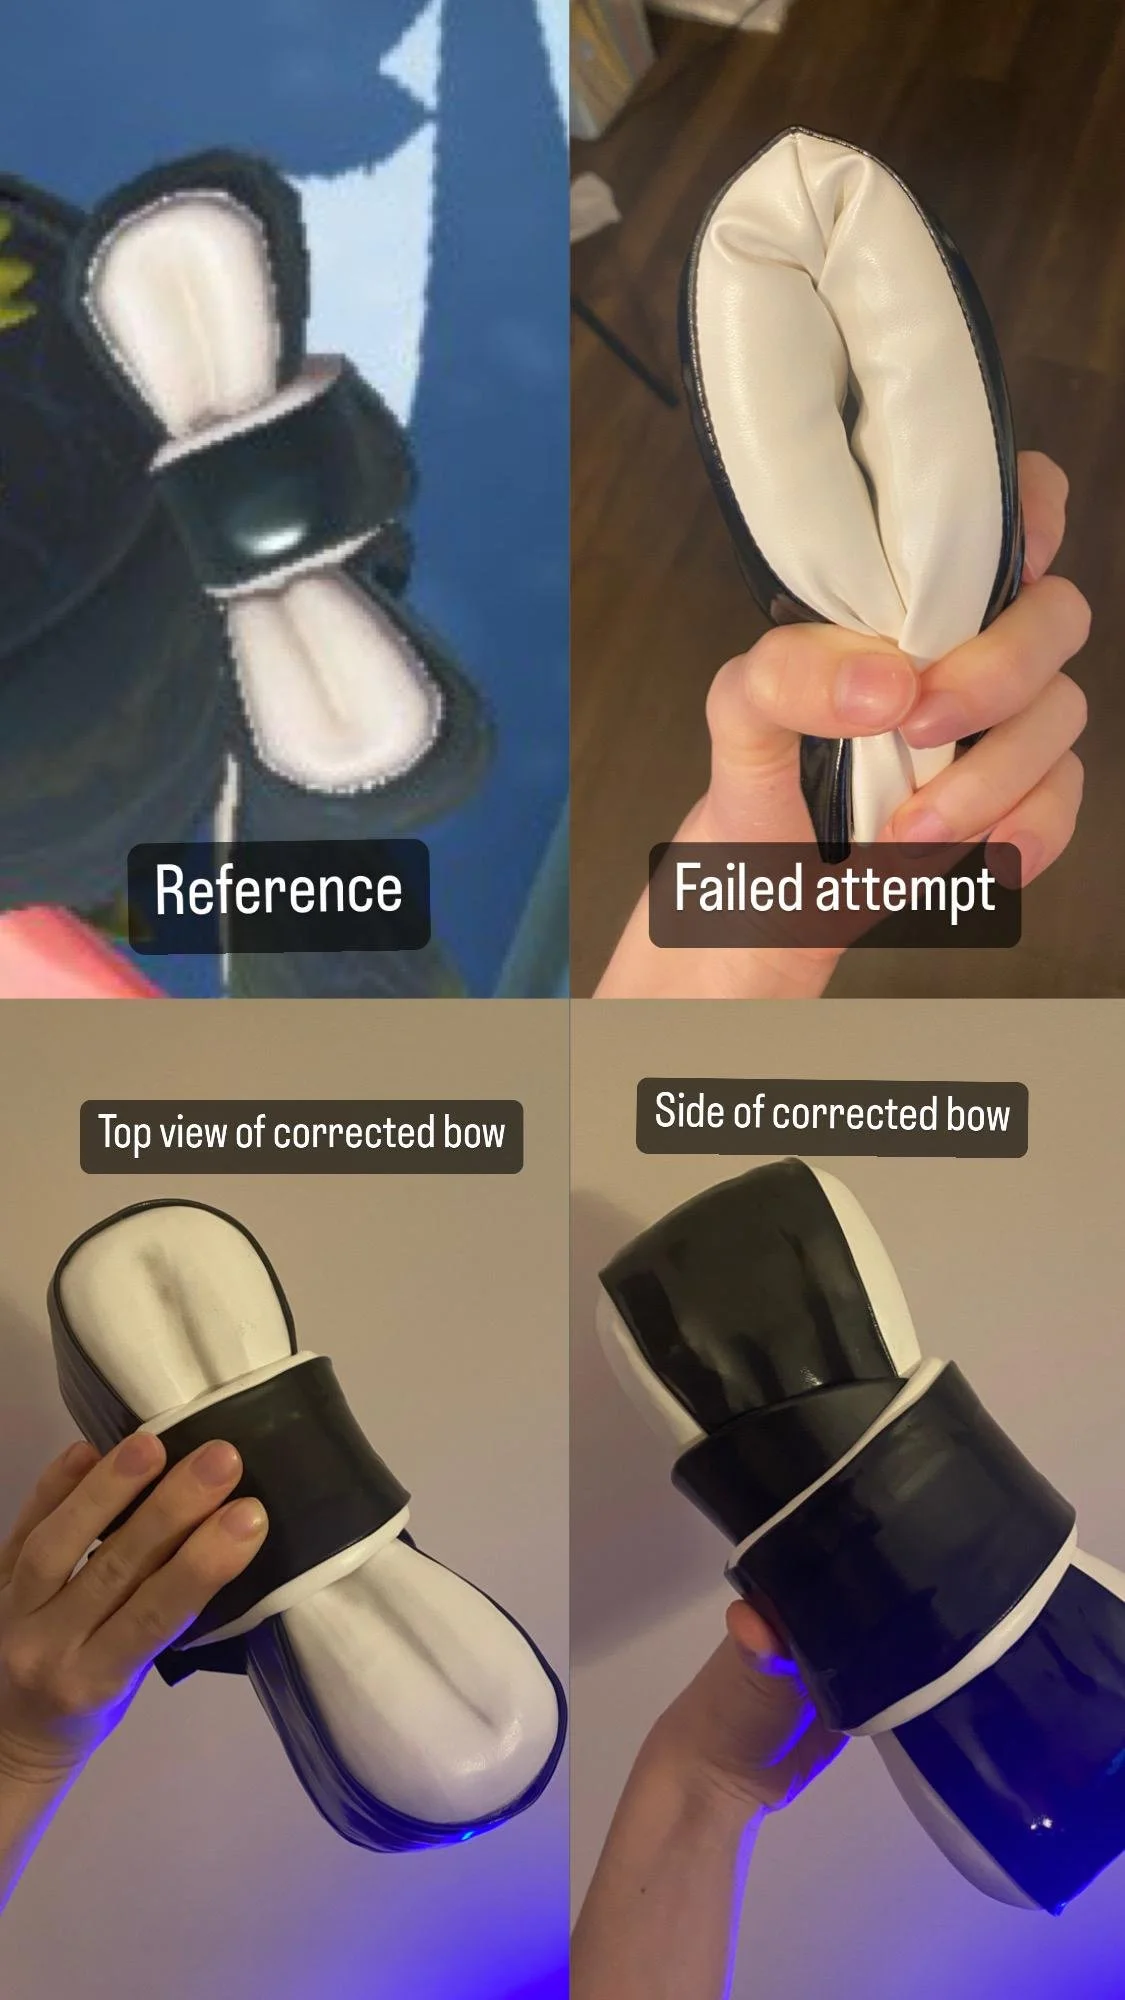
Look to the picture to the right….
The failed attempt (top right photo)… was my first attempt at making the bow. It was more so the pillow sewing method (essentially I had a long strip of upholstery foam and I sewed a ‘pillow’ to encase it. I folded the foam piece in half.
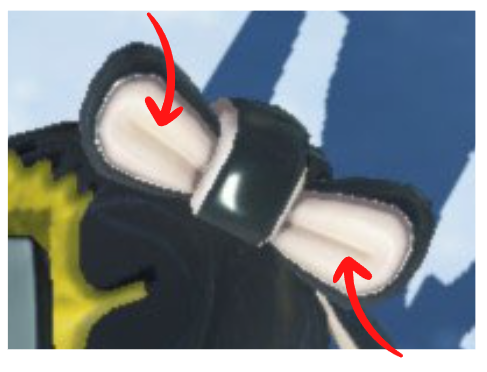
Why did this fail? Notice the puckering along where the bow bends. Notice how the reference does NOT have those puckers.
Now look at my successful second attempt (bottom two photos)… I did the EVA foam sculpting cube method with this one. Because I was able to do the EVA foam method - I could glue vinyl on top which ultimately avoided any puckering (don’t worry I will go over how to apply vinyl to each of the foams).
The EVA foam cube method gave the result I was looking for so that’s what we will go over in this tutorial…..
Once again… Put your bow in a cube….
Rotate in its cube. What does each view look like?
Oh wait… I did already start doing this step for you… didn’t I? xD
Here is a LINK to the patterns! Don’t forget to scale them!
TOP VIEW
FRONT VIEW


This one is a bit complicated compared to the sponge and the triangles….
You will want to break this piece down a bit to make it easier to build.
I broke it down first between the center wrapped piece and the bone looking bow-ed out shape (kinda looks like an 8 front the top view or maybe a weird noodle).
And then further broke each part down to what would be the white inner parts and the black outer parts. We are not going to worry about the black parts right now because that is literally all done with fabric. Instead we are doing all the white pieces of the bow.


Photo above should give you a good idea of the kinds of shapes you are basically making.
The bone looking white foam and a band that wraps around it.
Start with the bone looking shape which will be the main base of the bow! USE THE CUBE METHOD!!!!!
Because the bow is fairly big - I used a hand held belt sander after I was done cutting the basic shape I needed using the cube method.
The handheld belt sander majorly sped up the amount of time I had to sand because I was able to sand away larger potions at the same time.
PLEASE BE AWARE - THIS IS A POWER TOOL!
Anything in the workshop can and will harm you! PLEASE use proper safety equipment or seek help when needed!
If you are not comfortable using a handheld belt sander then no worries… a dremel still works fine. Again be careful! Also practice safety procedures.

Psst don’t forget to round the edges AND inner edge after you get the shape you are looking for. Its supposed to look like its folded over.
We are totally making a fake bow!
but no one else needs to know that….
Now to do the wrap around the bone like shape. Its really just a long layer of foam wrapped around it.
Its pretty easy to make since there isn’t much foam sculpting to it….


Wrap your bone like bow piece with saran wrap and masking tape.
Draw where the wrap will be.

From the reference it is supposed to look like it wraps around twice… but I thought it would be too bulky that way.
So its really one long 4mm EVA piece (the one labeled front) and a little sliver 2mm piece on the edge under the main piece.
DO NOT GLUE THESE TOGETHER YET
You will want to apply the vinyl first before putting everything together. Its just way easier that way. Again I will go over how to apply the vinyl in another part of this tutorial!
And that should be it for your sculptural pieces on your Callie wig.
Remember you can apply these same techniques to pretty much any foam thing you make. Not just foam wigs!
