
Ganyu Digital Patterns


Genshin Impact Ganyu Free Digital Patterns
Awhile back I made a Ganyu cosplay from Genshin Impact. The costume was heavy with custom patterns that I created in ClipStudio based on the designs from the game. Recently a few people have reached out to me asking about the digital patterns and how I made the cosplay.
I have created a Google Drive folder with all the patterns I made for my Ganyu cosplay which include the sleeves, gloves, tight details, details on collar, capelet, skirt, front panel, and details on the shoes.
If you have any questions about the build feel free to reach out to me!
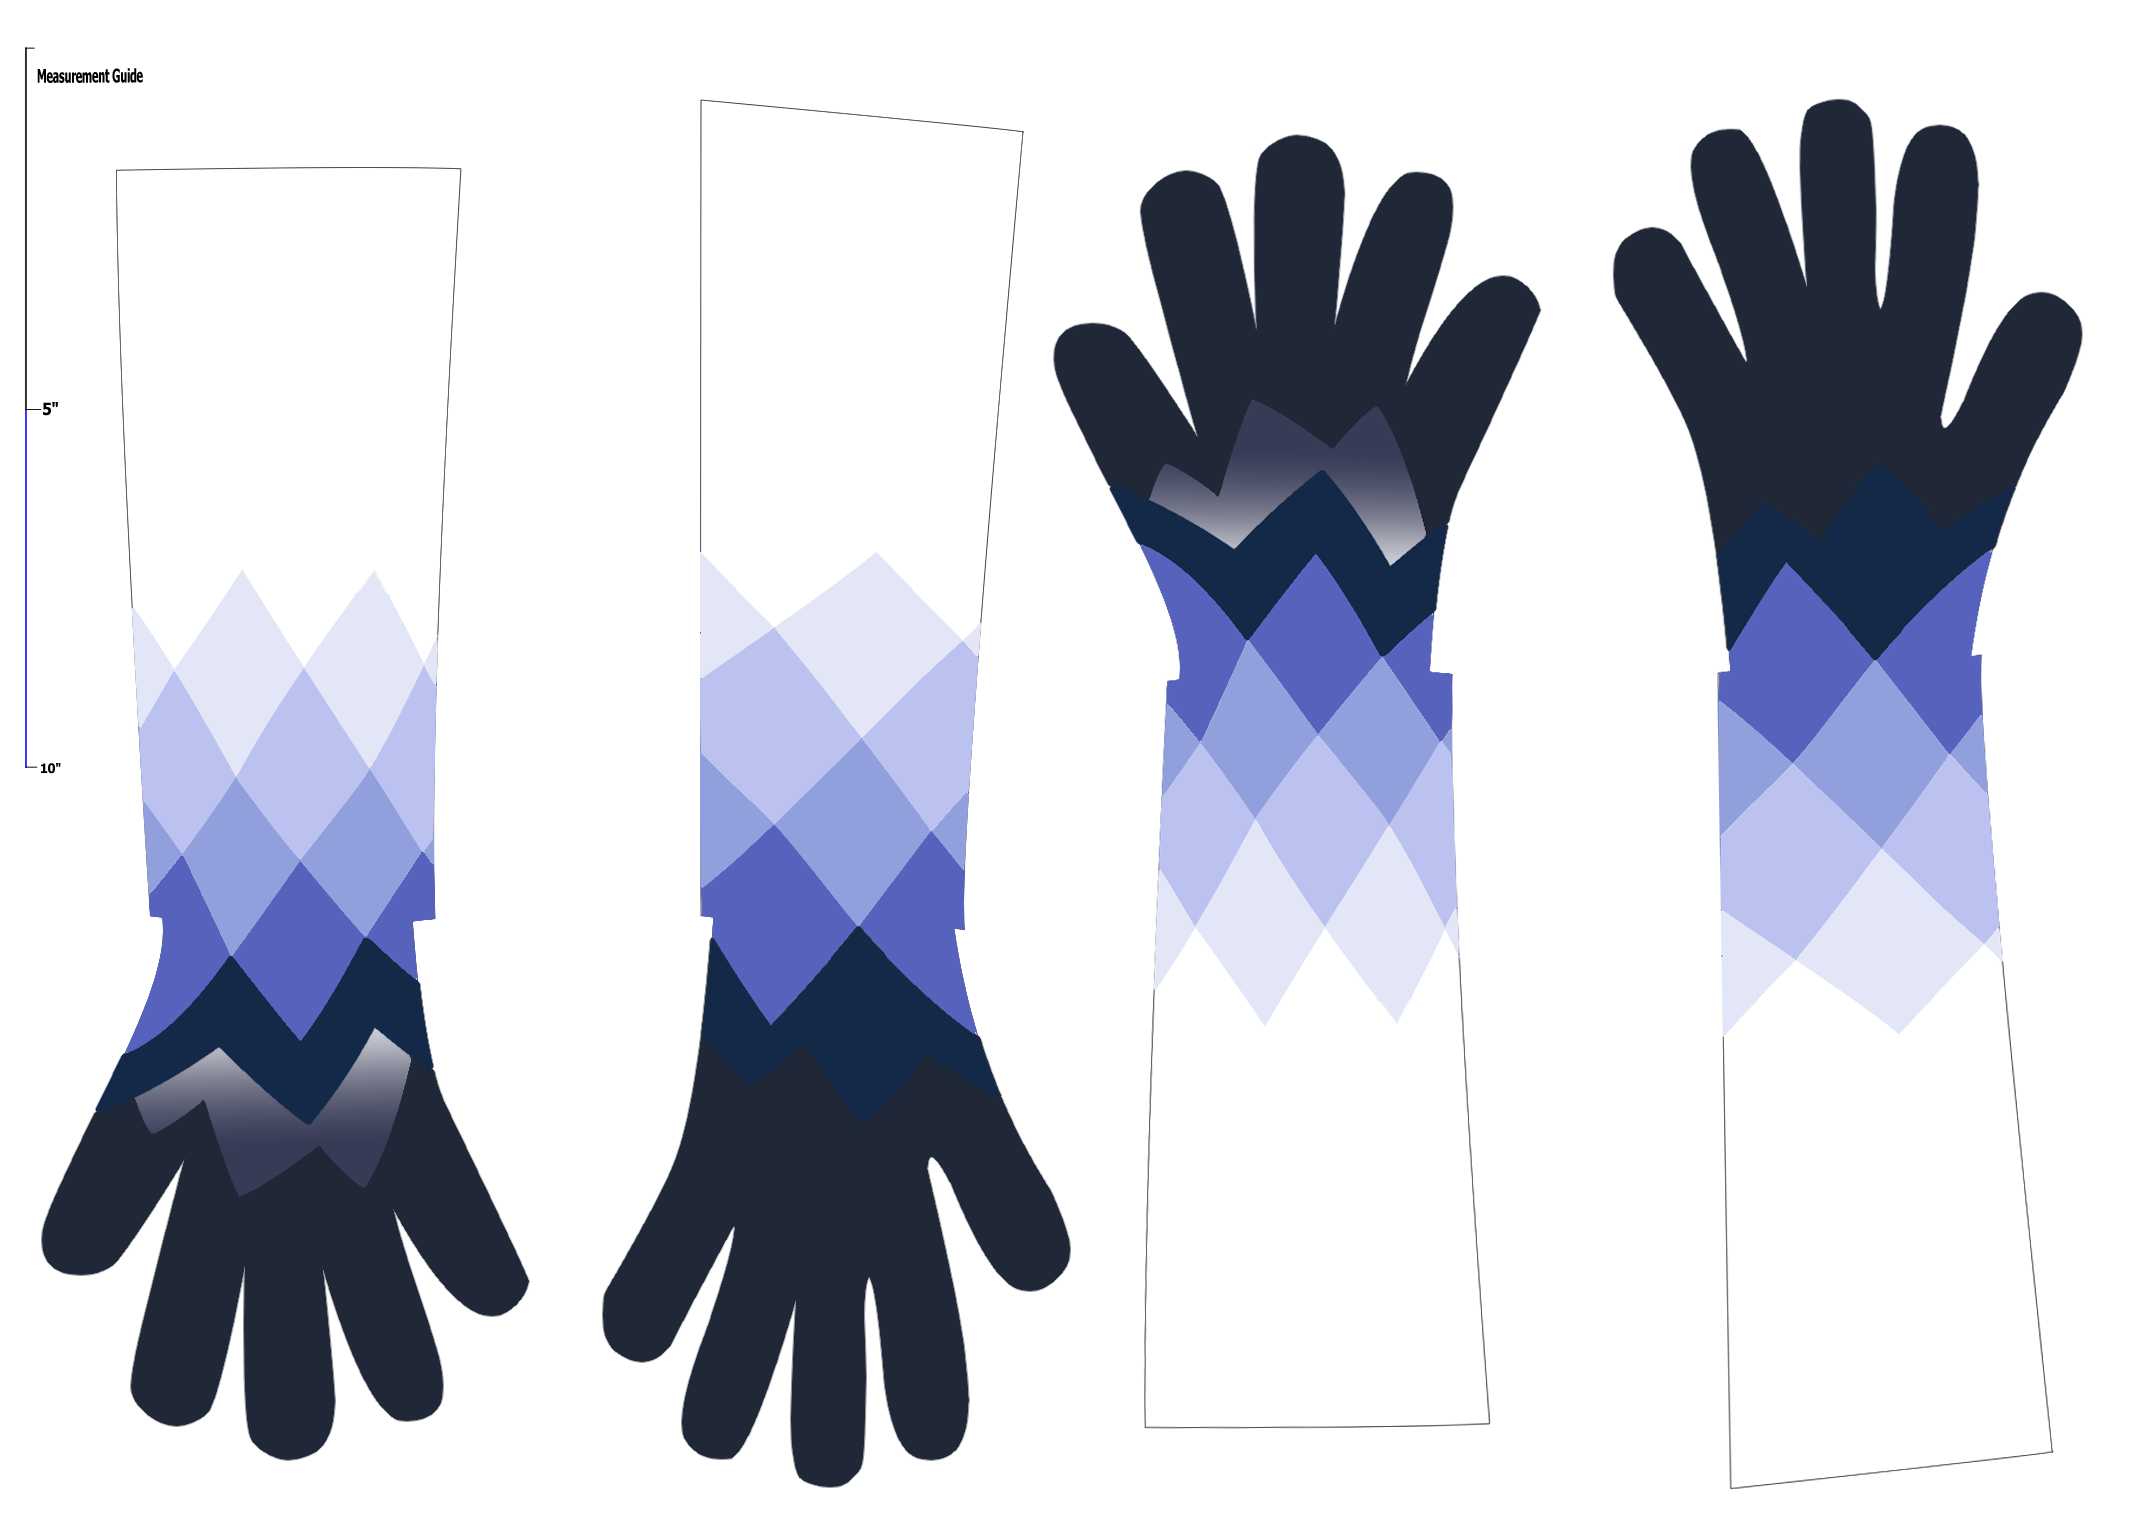
Glove Pattern
The gloves I had printed on custom fabric at Contrado.
The order details were":
Slinky Lycra Matte 6.2 oz, Order by Custom Dimensions, Select Units: inch, Print Width: 30, Print Length: 23, Uneven scissor cut (free)
If you look close on the pattern you will see a measurement guide line on the far left.

Primary Painting Method
Aside from custom fabric - I did airbrush all the blue details on the costume. Essentially what I did was printed the digital patterns I made on sticker pattern and exacto blade cut them out. Then I stuck the pattern on the fabric and piece by piece removed parts to paint (then recover so I don’t over paint any spots)
BEWARE OF OVERSPRAY!
Make sure the white spots are covered so you don’t overspray onto the white!!

Gold Pieces
I did the very popular fabric to foam method for all the gold pieces.
Here is the formula for the method… (make sure your fabric pieces has ‘seam allowance’)
Apply layer of contact cement on the top (visible side) of the foam piece and a layer to the wrong side of the gold fabric. (pro tip: use fabrics like stretch vinyls… Contact cement can’t leak through to the other side on those like they would on things like cotton or other porous fabrics).
WAIT 5-10 MINUTES (essentially until it doesn’t look wet)
Apply another layer of contact cement on fabric and foam.
WAIT ANOTHER 5-10 MINUTES.
Stick fabric on the foam piece. Press any creases away. Should be smooth.
Apply layer of contact cement to the edge of the foam and the ‘seam allowance’ of the gold fabric.
WAIT AGAIN (yeah there is a lot of waiting)
Gently pull fabric seam allowance up on to JUST THE EDGE of the foam. (not the backside!). Now the top of the fabric and the edge should be covered.
Touch ups…. Any spots peeling away on the edge? Now is the time to apply some more contact cement, wait, then stick.
Finally apply contact cement to the BACK of the foam piece and on another piece of gold fabric (that has seam allowance). Wait. Repeat again. Wait. And stick that fabric piece on! Press the seam allowances together.
Wait some more (an hour or two should be fine just so it doesn’t peel away so easily)….Trim the edges close to the piece.
I know that that’s A TON of info. And honestly it took even me a lot of time to get the fabric to foam method right. I do plan to write up a better tutorial for you in the future on how to do the method. In the meantime feel free to reach out to me if you have questions on how to accomplish it.

Horns by Shrouded Scales
You can check out their work HERE!