
Bunny RWBY Ruby Tutorial

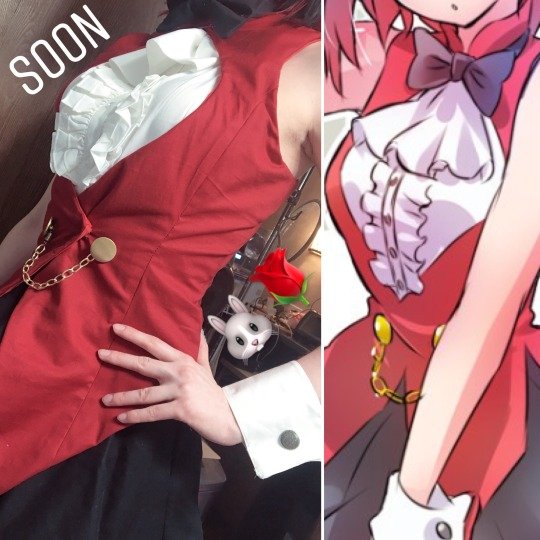
How I made my RWBY Bunny Ruby based on Art by Mojojoj27827860
Its been awhile since I have done a tutorial post. But because I am hosting a Bunny RWBY gathering at RTX Austin TX 2018 - figured I throw this guide together for you guys <3
Let’s start with the VEST

I started out with the Harlots and Angels “Asylum” sewing pattern
If you are using this pattern please take note of the different sizes and choose appropriately. I got super excited and ending up buying one that was entirely too big on me! But I made it work!
And made the following alterations to it:
Took out all corset elements. (don’t worry about boning unless if you really want to).

Closed up the back (no need to have it lace in the back
Altered the closure in the front (made it so that it was more triangular and closes with snaps rather than the clasps that the pattern directs you to buy.

Extended the length of the top center of the vest where bodice meets collar (just made it so that the center front came together.
Added tailcoat fins to front and back.
Shortened the shoulder length
Altered the pattern so that the weird shoulder piece is directly part of the front pattern instead of sewing it on separately (see blue line for new seam)
Added/removed fabric for the chest opening piece to make it more rounded diamond shaped
Extended the length of the collar (Above is a photo of my pattern with 5/8 seam allowance). Cut on fold! 2 of your actual fabric and 1 for interfacing!
I also lined my vest! Essentially I sewed together the top fabric together. Then sewed the lining separately. I matched up seams then I used bias tape around the entire edge of the fabric. It overall made the costume much nicer!

But what about the buttons and the chain?!?

Gold Buttons and Chain found at JoAnns
For the buttons I used 2 La Mode Satin Gold buttons in 1 1/8 inch from JoAnn’s Fabrics! Or you can go online and get them [ HERE ]
The chain I found in the jewelry section. I simply matched the color to the buttons!
Lastly how it all comes together is… collar piece I just used a safety pin to bring it together.
And the spot where the buttons are (PLOT TWIST: they aren’t actually functional)…. I just have it snap together then the chain has a magnet attached to it so I can take the vest on an off without difficulty.


I removed the sleeves
Cut away some of the armscye so that the vest covered it.
Removed the collar
That frilly thing on the front was weird to do because attaching it to the shirt just made the shirt sag down a bit because mine had a big of weight.
Instead the frilly piece was entirely separate from the shirt.
Using the sleeve fabric that I cut off - made a long rectangle and gathered. Then I attached it to some ribbon that I would tie onto myself after I put on the shirt.
BUNNY EARS and TAIL

Probably the easier part of the entire cosplay. I just bought the bunny ears and tail on Amazon! Psst - the bunny ears come in a variety pack so you get 6 of them in different colors!
The bow I also bought but at Michaels. Here is a LINK to the product.

SKIRT
Shirt is actually a high waist circle skirt.
Circle skirts are pretty easy to make. If you are struggling with a pattern then check out this link [ HERE ].
ALSO PRO TIP - HORSEHAIR BRAID MAKES THE SKIRT DRAPE AMAZINGLY! Consider putting it into your skirt to give it more adorable floof!
Then of course the red fabric I just gathered and sewn along the edge of the skirt.

The Garter Belt
I found the perfect trim at JoAnn’s! Only problem was it wasn’t gathered enough. So I took off the stitching and did a gather then re-sewed to the trim.
Then I used black ribbon to thread through it and tie around my leg.
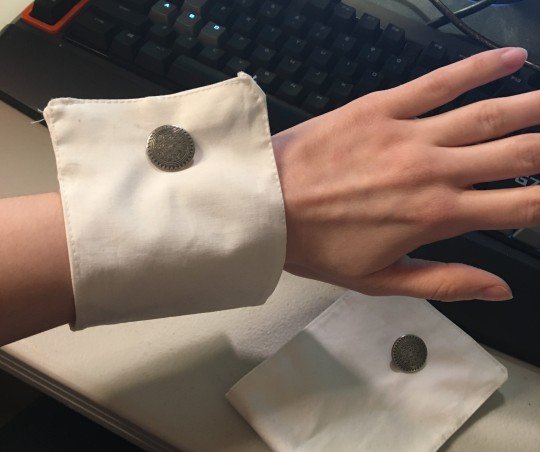
CUFFS
Another fairly easy part of the cosplay.
This was essentially a long rectangle of white fabric folded over and snapped together. You can use cuff links or buttons on either side to make it look like a cuff!

BOW
Another PLOT TWIST - its not tied like a real bow!
Instead its a rectangle with weird curves on the ends and wrapped with a small piece of fabric. Easy.
Essentially you would want to copy my pattern above (includes 5/8 Seam Allowance). Cut 2 on fabric and 2 on interfacing! Sew right sides together and flip inside out!
Wrap a small piece of fabric around the center.
And sew a long strand to wrap then snap around your neck.
SHOES & TIGHTS
Alright so the tights I just picked up a pair that had an interesting diamond pattern to them. And I ended up using these shoes [ HERE ].

And you are done!